
Collector motors are more common than inverter motors, but they require intermediate repairs. The electric brushes provided on them, which smooth out the friction force coming from the engine, wear out over time and require replacement. If they are not replaced, the mechanism begins to spark, overheat and fail, threatening the equipment as a whole. Replacing the brushes of the electric motor of a Siemens washing machine does not require special skills and tools - you can do everything yourself. Let's take a closer look at the entire procedure from diagnostics to a test run.
Electric brushes are cases with carbon tips. When the "carbons" wear down to critical values, the motor starts sparking, and the washing machine signals a malfunction. As a rule, you can suspect problems with the engine by the following signs:
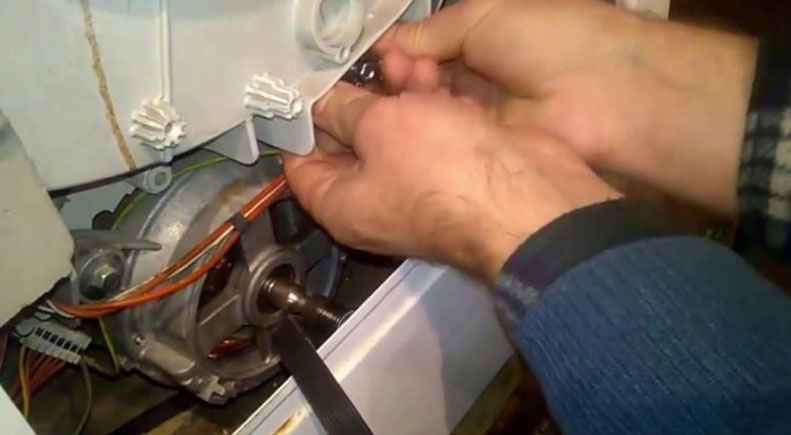
Ideally, the self-diagnostic system should report engine problems: display the corresponding code on the machine display. It is quite difficult to guess about worn brushes based on other "symptoms". It is better to monitor their condition by periodically checking the length of the carbon tips. To check the brushes and assess their condition, you must first dismantle the engine.
Particular attention should be paid to the supplied wiring. Before disconnecting it, it is recommended to mark the wires or take a photo to avoid mistakes during reassembly. Remember that incorrect connection of contacts is fraught with a short circuit!
The procedure for diagnosing and replacing brushes is a medium-complexity manipulation. In addition to the simple repair scheme, the user will be pleased with the "basic" set of tools. It is enough to prepare:
Be sure to find replacement electric brushes. They can be ordered online, bought at a service center or in a specialized store. The main thing is to choose the right analogue: carbon tips vary in size and type of contacts. To avoid mistakes, you need to clarify the serial number of the existing Siemens or show the consultant old cases as a sample.
Having prepared the tools and components for replacement, we proceed to diagnostics. Fortunately, there is no need to disassemble the engine - the required elements are located on the engine housing. More precisely, the electric brushes are fixed on both sides of the motor housing.
It is difficult to confuse electric brushes. These are cases with a wire and a spring that presses the element to the motor body. The carbon tip is "hidden" inside, so first you need to take out each brush and inspect it. We do this:
If one of the brushes is worn out, then both need to be replaced. Unpack the new ones and place them in the "nests", repeating the location of the old ones. It is important not to mix them up, otherwise the "carbon" will not be fixed in the seat. Next, completely compress the spring and insert it into the crossbar. It is quite difficult to do this on the first try, since the wire is long. Then fix the position of the rods by placing the contacts in the clamp and moving them towards the power wire. Next, connect the core to the terminal.
The second brush is replaced in a similar way. It is worth noting that the rods are changed in pairs, even if one of them is completely undamaged. This trick will help extend the service life of the motor. Otherwise, an imbalance will occur: one "carbon" will "grind", and the second will work idle. At the "finish", do not forget to check the reliability of the contacts.
After replacing the electric brushes, a test wash is always started, during which the quality of the repair is assessed. But it is worth understanding that the machine will work noisier during the first few cycles. The fact is that the new carbon tips must rub in, adjusting to the motor.
Immediately after the repair, the engine is returned to its place, and the Siemens washing machine is connected to the utilities. Then the "Spin" program is started at the maximum possible speed. The more intensively the engine accelerates, the faster the brushes will rub in.
It is important to remember that untimely replacement of electric brushes is fraught with serious consequences, including the "fatal outcome" of the engine and control board. It is better not to take risks, but to regularly check the condition of the rods. It is enough to dismantle the engine once a year according to the instructions described above, take out the brushes and measure the length of the "carbons". Replacing electric brushes is a simple procedure that any Siemens user can perform with due diligence and a competent approach. The main thing is to remember safety precautions and strictly follow the instructions.


Copyright © 2020 Coimbatore Service.