
The task of removing the front panel of a washing machine appears when you need to replace the drum cuff, repair the hatch locking device, remove the tank, or gain access to the bearings. In fact, removing the front wall is quite simple. The only tools you need are a couple of screwdrivers. We'll tell you how dismantling is done.
To comfortably disassemble the body of the Candy washing machine, you will need approximately 2 square meters. m. Ideally, move the machine to a garage or workshop - it will be more convenient to repair the device there. However, you can also do the work “on site” without leaving your home.
The first thing to do is turn off the power to the Candy machine, disconnect it from the water supply and sewerage. Next, move the washing machine away from the wall or out of the furniture set. If possible, move the device from the bathroom to a larger room - the kitchen or hallway.
Before you begin dismantling the front panel, you should also:
At this point, the preparation of the Candy machine can be considered complete. Next, the front panel is removed. If you are disassembling the washing machine for the first time, it is better to record your actions with a camera. This will help avoid problems during subsequent equipment assembly.
Now that the washer is completely ready for disassembly, arm yourself with a Phillips screwdriver. The next step is to remove the Candy lid. The top panel is fixed with two self-tapping screws, which will have to be unscrewed.
After removing the screws, grab the back of the cover, slightly lift the part and push it away from you. This will release the panel from the plastic clips, and it can be removed. Don't press too hard, or the latches will break, making it impossible to get the top of the washer back in place.
Next in line is tidying up. There is no need to remove the entire control panel to disconnect the wiring from the module. Algorithm of actions:
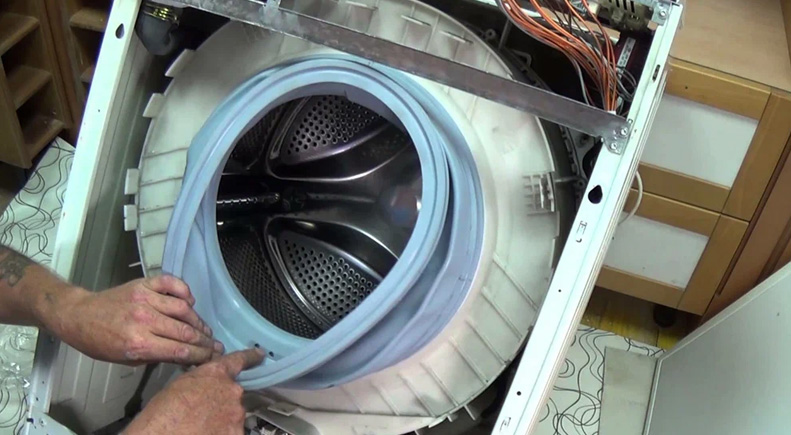
Next you need to deal with the drum cuff. Using a slotted screwdriver, loosen the clamp securing it and remove the rim. After this, insert the released seal into the Candy washing machine
Next, work with UBL. Disconnect the lock fasteners so as not to break the interlock wiring when dismantling the wall. Now, finally, you can unscrew the bolts around the perimeter of the front panel of the SMA.
The front panel, after the above steps, will be removed without much effort. Many are afraid that the hatch door will interfere with dismantling and try to disassemble the sash. In fact, it is not necessary to do this - the front wall will leave its place without any problems.


Copyright © 2020 Coimbatore Service.