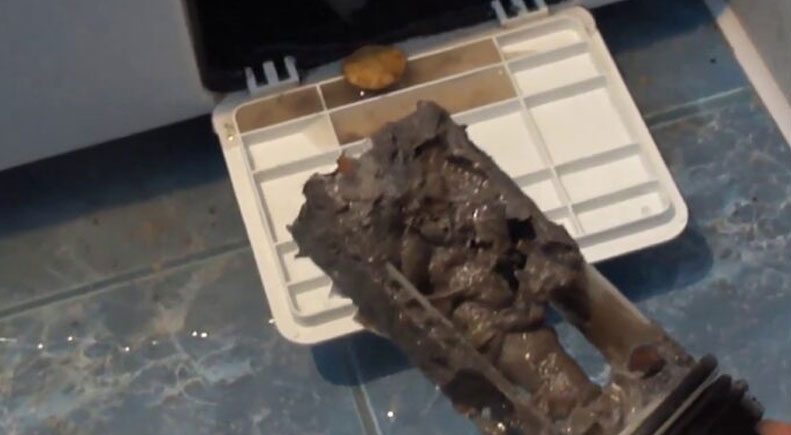
How to clean a siemens washing machine filter

Regular cleaning of the Siemens washing machine filter is the key to its high-quality and trouble-free operation. Without timely "cleaning", the drain will become so clogged that water will stop flowing into the sewer, and at one point the machine will "stop" with a full tank. To prevent stagnation, you should periodically check the condition of the drainage. Cleaning the filter is considered an easy procedure, but it has its own rules and nuances, without knowing which you can get confused and flood the apartment. We suggest not to take risks, but to follow the proven instructions.
First, let's find the filter element.
To clean the dust filter, you must first find it and remove it from the machine. This is easy to do: on most modern machines, it is located in the lower right corner of the body. Siemens will not be an exception - on their machines, the "dustbin" is in a standard place.
On older Siemens front models, the filter immediately catches the eye, as it “sticks out” at the bottom of the case. On modern machines, for beauty and safety, the drainage is masked by a decorative panel. As a rule, there are three types of technical hatches on washing machines, differing in shape and opening method:
- It is enough to pry the rectangular door with a fingernail or a knife, after which the panel will detach from the body,
- The round hatch opens after a slight push,
- A narrow long panel, which takes up the entire bottom of the case, leaves its place after pressing all three plastic latches with a flat screwdriver.
Siemens top-loading washing machines also have a trash filter. It is located in the front part of the body, but most often occupies the lower left position. As a rule, the nozzle is masked by a small round or square false panel. Despite the slightly different location, both the front-loading and top-loading machines have the trash can unscrewed and cleaned according to the same instructions. How exactly, we will consider below.
We remove debris from the filter
Having decided on the location of the filter, you can begin to unscrew and clean it. First, disconnect the machine from the utilities, and second, move it slightly away from the wall. Then tilt the body back and begin the procedure:
- We disconnect the technical hatch door from Siemens,
- We put a container under it to collect water,
- Next to the filter plug we find a hose - an emergency drain device,
- We pull the hose towards ourselves, take out the plug and drain the water into the prepared container,
- We take hold of the protruding part of the filter and unscrew it, acting counterclockwise,
- We collect the water that remains in the machine.
Pulling out the filter is only half the job. Next, you need to clean both the seat and the nozzle itself. First, wipe the freed hole with a dish sponge, then clean the "spiral" from dirt. Return the clean "trash can" to the "nest" and screw it tightly clockwise. At the "finish", close the hatch and return Siemens to the vertical position.
The filter element is stuck
More often, you can unscrew the filter by applying a little force - the nozzle "gives in" and easily leaves the seat. But sometimes the spiral is so dirty that it sticks to the body and cannot be pulled out. Then you will not be able to pull out the "trash can" in the standard way, you will have to act differently.
Trying to unscrew the filter by poking around with a screwdriver is not worth it. Firstly, it will not bring the expected result. Secondly, you can damage the nozzle and strip the thread. It is better to remove the part in a safer way, partially disassembling the Siemens case. It is enough to remove the front panel, providing free access to the drainage system. We act as follows:
- Disconnect Siemens from communications,
- Unscrew the end of the washing machine and put it aside,
- We find the drain block, consisting of a snail, a pump, a filter and pipes,
- Loosen the clamps on the pipes,
- We take out the snail with the pump and filter,
- We turn the snail over with the nozzle facing upwards,
- We dismantle the pump (turn it clockwise until it stops, then push the locking pin and repeat the turn).
After removing the pump, the internal cavity of the snail will be exposed. It must be thoroughly cleaned and ideally soaked in WD-40 or lemon. Then the unit is reassembled and returned to the machine. That's it! Cleaning is complete.


